First Craft Fair Ever
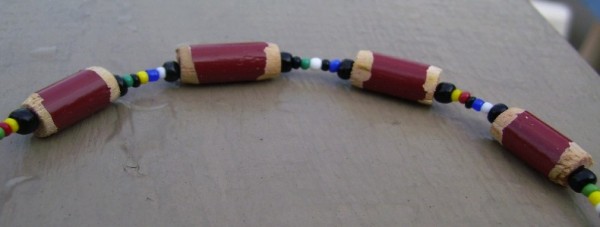
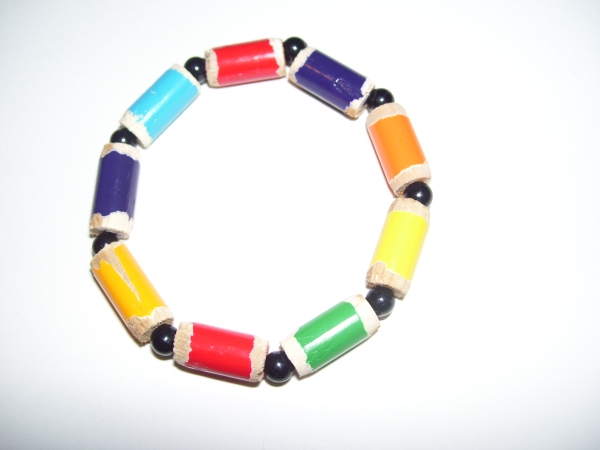
So I just wanted to share with you all the fact that I just did my first craft fair, and wanted to share a few pictures of the items that I sold there! First off I made some cold process soap to sell. I’ve debated making a tutorial on making cold process soap, although it’s hard to take picture of myself doing it, while I’m all decked out in rubber gloves and googles. Let me know though if you want a tutorial, and I will do my best. 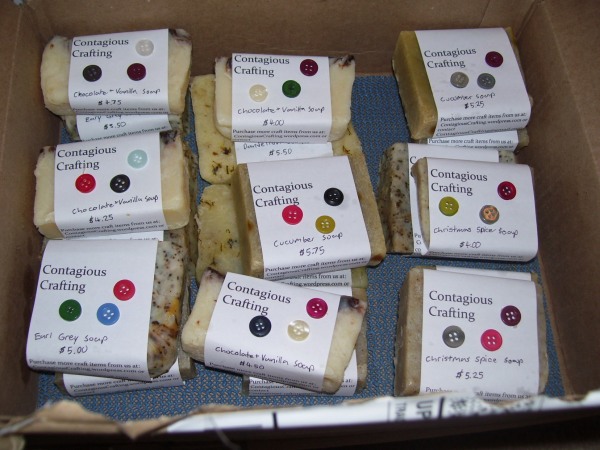 Next I made some of my infamous pencil crayon jewelry. The technique to make these beads are the same as in my post found here
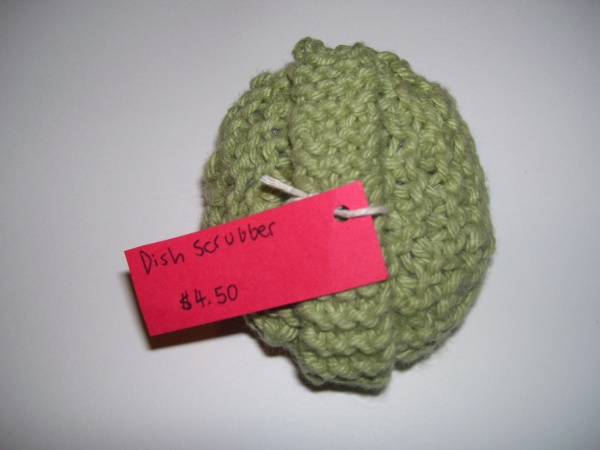
  As a quick little craft, I also knitted some dish scrubbers. These took only about 40 minutes for me to make one, and I’m a relatively slow knitter too! Perhaps I can make a tutorial for this one as well at some point.
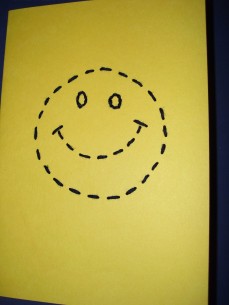
  Apart from that I sold a bunch more jewelry, alongside some knitted scarves and hats. I also sold some of my handmade cards, including my embroidered cards (tutorial here), and my junk mail cards (tutorial found here)
Any of you ever done a craft fair before? How did it go for you, and what kinds of items did you sell?
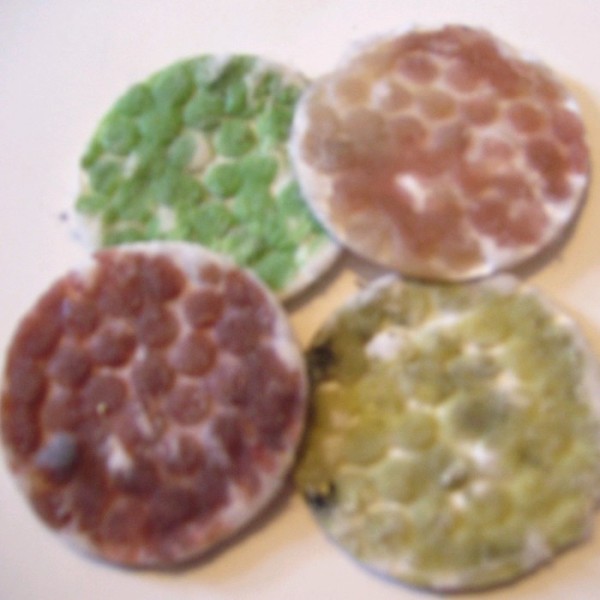
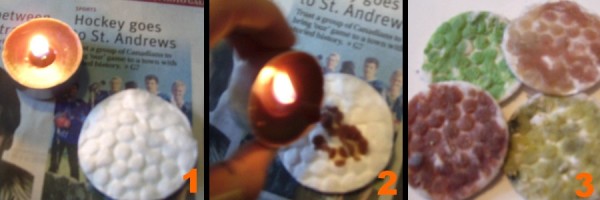
Cotton and Wax Fire Starters
Here’s a tutorial for those of you who love camping. Credit for the original tutorial for this craft goes to JERRM’s Outside The tutorial is really simple for this and all it requires is candles and cotton pads.
To make this get your cotton pads ready, and decided how you want to melt your wax. I simply lit candles and let them melt as I poured the hot wax on to the cotton pads. You can also just melt wax on a stove top in a pot, or stick it in a glass bowl in the oven and let it melt. The method you use will help determine whether you pour the wax on to the cotton pad, or simply dip the cotton pad into the melted wax. Make sure you cover both sides of the cotton pad with wax.
When you want to use one of these to start a fire, simply tear it in half so the fibers are exposed, to help your campfire catch easier.
Wearable Art, Fashion Show Pictures
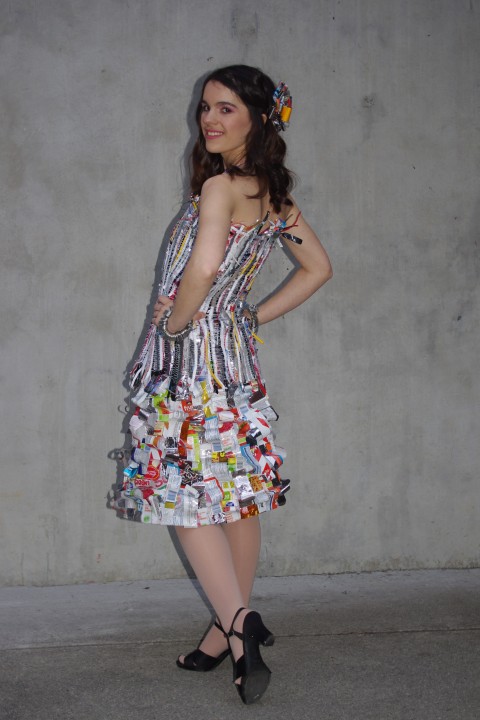
So this post will not be a tutorial; but, I thought I’d dig up some photos of some dresses that I made out of recycled materials back in High School, for a wearable art fashion show for charity. My first dress below got me an ‘honorable mention’ and in my opinion was the better of the two. The dress was made out of paper beads, all of which I rolled and strung together myself. The paper for them came out of a bunch of National Geographic magazines, some of which were dated back to the 70’s and 80’s! It took about 1,300 beads to make the dress, and a lot of hours (though don’t ask me how many, because I can’t say I counted the number of hours). I managed to make it in about a months time though, and chose to model it myself.

The second dress that I made, pictured below, won me first place, although I still stand by my opinion that my first dress was the better of the two. The corset top for this was made on a weaving loom, and woven into it was everything from electrical wires, wrappers, the tape out of old cassettes, lint, and shredded paper. The skirt was made by first sewing the basic shape for it, out of plastic grocery bags. From there using double sided tape, I attached food wrappers. Finally using my left over wrappers I also made myself a bow for my hair.
Homemade Hot Pack With Rice Filling
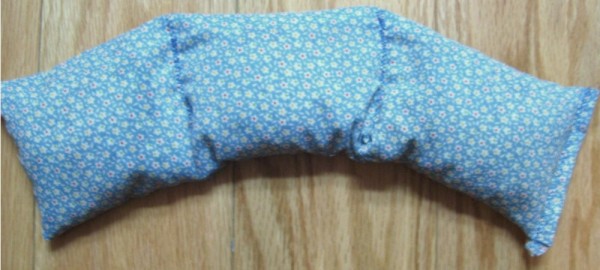
This tutorial is going to teach you how to sew your own Hot Pack, with a rice filling. Hot packs can be great for any sort of muscle pains, pregnancy, and even just to go to sleep. I’m not much of a sewer, but hot packs are fairly simple to make so long as you know how to operate a sewing machine. The Supplies you need for this are:
– A sewing machine along with a spool of thread
– fabric of your choice (cotton or flannel is best)
– fabric scissors
– an iron
– rice and any other additives you want in the filling (ie. essential oils, dried flowers like lavender, cloves, spices such as cinnamon)
The steps alongside pictures for this project are:
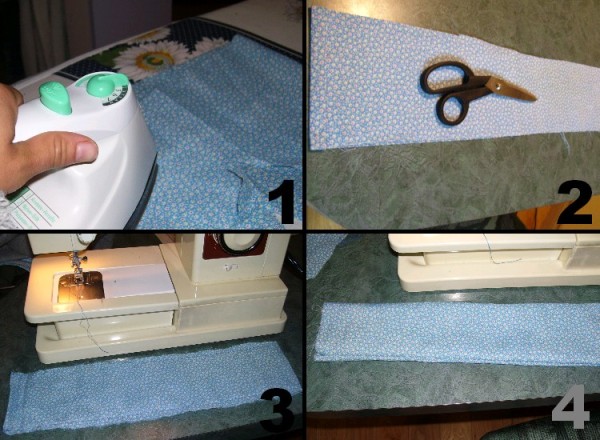
1. Iron the fabric that you chose
2. Cut out your fabric. I choose to cut mine into a rectangular shape, but some people prefer square shaped hot packs. I made mine so that when the rectangle piece of fabric is folded and sewn up, my hot pack would measure about 12 inches in length, and about 3 inches in height.
3. keep the end where you need to pour the rice in open, sew up all the other sides of your hot pack.
4. Now flip you rice pack inside out, before we move on to the next steps.

5. From here, measure out how much rice you need to fill your hot pack, and if you would like, mix in any additives with it, such as: essential oils, open up a bag of your favorite tea and put it in, add in dried flowers or plants that give off a nice scent, add spices like whole cloves, or powdered cinnamon.
6. From here, using a funnel, pour your mixture of rice and any additives into the hot pack.

7. For the end that is still open, close it up by folding it down about 1cm, and the fold it a second time again at about 1cm. From there, using the zig-zag stitch on the machine, sew it up so all the content stay inside the hot pack.
8. Finally, although not necessary, it can be a good idea to sew a few chambers in your hot pack. You can use either the straight stitch, or the zig-zag stitch to create these chambers. This then keeps the contents in the hot pack more evenly distributed
Hope you enjoy your hot pack! This can always make a great and easy gift to make and give to people for holiday’s, and everyone appreciated the hard work put into a DIY project!
Pencil Crayon Necklace Tutorial #2
Here I am with yet another pencil crayon necklace tutorial. For this necklace though that I made, the supplies needed are:
– pencil crayons
– a pencil sharpener
– a ruler
– an electric drill
– a saw (preferably an electric type of saw. I myself used a scroll saw)
– varnish *optional
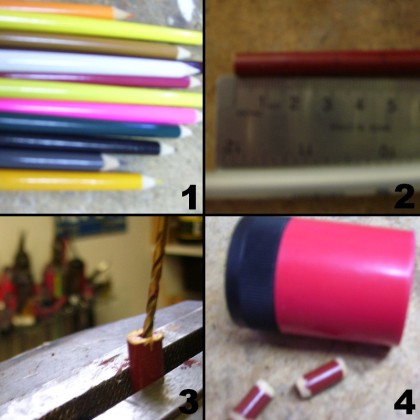
The steps with images below are:
1. gather together pencil crayon colours of your choice, for the colours of beads you would like.
2. using a pencil or permanent marker, mark at equal increments, where you want to cut the pencil, for making the same sized beads. For my beads I made them 1.5cm long. The longer your beads, the harder it becomes to drill through, without breaking the entire bead.
3. I place my cut out pieces of pencil crayons in a clap, and used a drill to slowly drill holes into it. Be warned you will break some beads in this process. To avoid doing that, use a quite small drilling bit, and try to drill out only the coloured center of the pencil crayon. To also avoid breaking the bead, it helps to pull the drill out of the bead halfway through, before you continue drilling all the way through it.
4. Finally this step is optional, depending on the look you want to give your bead. I then took my beads and sharpened both ends a little bit, to give it a more unique look. At this point, you may also choose to paint the bead with some type of varnish or acrylic sealer to make the beads last longer, and prevent any chipping. From there string the beads however you would like, with any other beads that you choose to use.
For my last tutorial for a necklace made using pencil crayons, you can go here to see it.
Wooden Geometric Statement Necklace
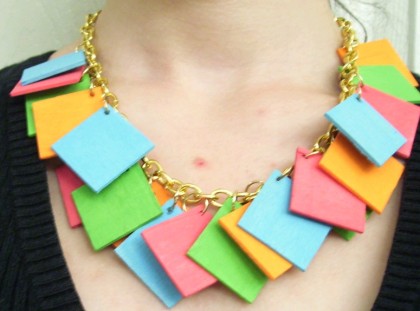
I’ve for some reason really gotten into the mood for making jewelry, so I warn you in advance that the months ahead may be filled with lots of jewelry tutorials; but, I’ll try to throw in the odd tutorial for some other craft to at least keep some variety to this blog! Today I’m sharing with you the tutorial for this fun, summery, wooden, geometrical necklace that I made. The supplies you’ll need to make this are:
– 16-20 square wooden shapes (buy from a craft store or cut your own, your choice!)
– acrylic paints
– an electric drill
– chain
– jump rings
– pliers
– jewelry clasp
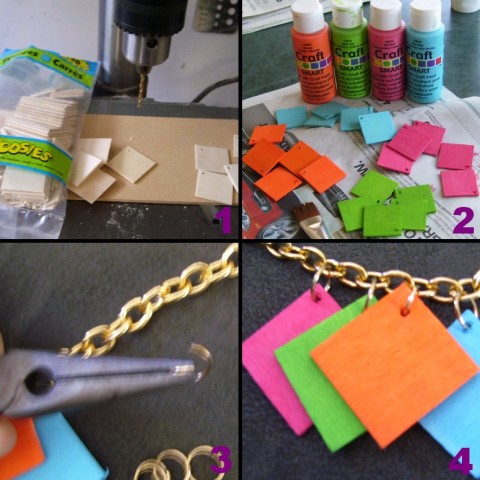
The steps are with photos below as always:
1. Using 16-20 wooden shapes (I originally used 20, but in the end my preference was 16 once I wore the necklace), drill a hole in one corner of each square. The hole needs to be big enough to later put a jump ring through.
2. Paint you squares in 4 different colours, as seen in the photo
3. Using pliers, open a jump ring to attach your wooden square to your chain, and then close the jump ring up again. You will also need to use jump rings to attach a jewelry clasp at the end of your chain (making sure your chain is the length you’d like it to be, my necklace is 45cm/16inches long.)
4. As you can see in the image, I attached my squares two away from the square before it, you may decide to do it a bit differently though based on the size of your chain and personal taste.
There you have it, A stylish statement necklace for summer!
Knitted Bath Pouf
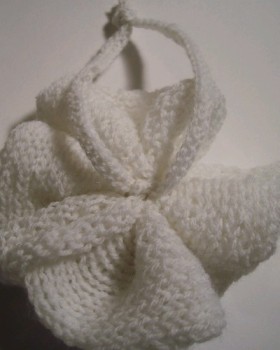
Call it a ‘bath srubber’, a ‘pouf’, or whatever you like. But today I am going to teach you how to make one. To make this you need to know how to cast on, do the knit stitch, and although not completely necessary it is recommended you know how to purl so that you can knit in stockinette stitch (*purl one row, knit one row*).
1. knit a rectangle in stockinette stitch (*purl one row, knit one row*, regular knit stitch can be used, without purling every second row) that is about 9 inches/23 centimeters wide, by 14 inches/36 centimeters long.
2. take the two long ends, and using a tapestry needle sew them together, so that you have formed a long tube.
3. Separately, you need to knit for your scrubber, a piece to tie it up with. Knit this piece so it’s just 3 stitches wide, and knit it to be about 9 inches/23 centimeters long. Once you have made this, lay it with you knitted rectangular tube piece scrunched up in the middle of it, as seen in the picture below.
4. Tie a knot with your skinny piece as in the picture, using a standard overhand knot, as in the picture, and double knot it to make it secure.
5. From here all you need to do is stitch together your two loose ends on your skinny piece, or tie them together, so that you can actually hang up your bath pouf.
6. And now it is done! This is a great gift idea that can be paired with other homemade bath products.

Let me know if you have any questions!
http://pinterest.com/rsjewelrydesign/
Plastic Bottle Ring Necklace
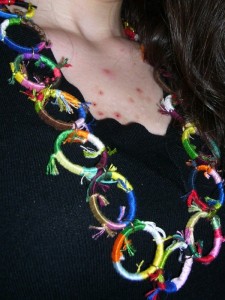
This bottle ring necklace was inspired by beyond bracelets video where she made pendents using plastic bottle rings covered in embroidery floss to make pendents in her video here: http://www.youtube.com/watch?v=LTAi5IAWgD4&list=PL3260DEDEE7612A37&index=21&feature=plpp_video
I decided to take the idea, and use it to make this statement necklace. The steps to make this necklace are with pictures:
1.Using a screw driver, pry of several plastic rings off of bottles, so you have about 15 of these, or enough so that lined up side by side they are about 9 inches/54cm.
2.Leaving a tail end of about 1 inch so you can knot it at the end, begin wrapping the embroidery floss, one way around the bottle cap.
3.In order to change colours of embroidery floss, use a knot to join pieces together, as you go along, leaving about 1cm long ends.
4.At the end, you will then use the to tail ends of the embroidery floss and knot them together.
5.Use a double knot to keep them in place, and trim the ends so they’re about 1cm long.
6.Repeat this process for all the bottle caps needed to make this necklace.

From there, once you have made all the rings needed for the necklace, the final few steps are:
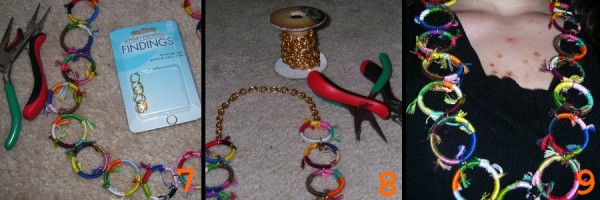
1.Using metal jumprings, join all the rings together ride by side
2.Use about 8inches/20cm worth of chain, and attach this to both ends of the bottle ring portion of the necklace, with the help of your pliers. (The chain that I used was 6.40 mm, and I found it at Michaels)
3.This is now what your necklace should look like!
Tissue Paper Flower
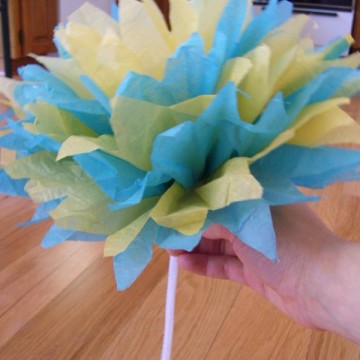
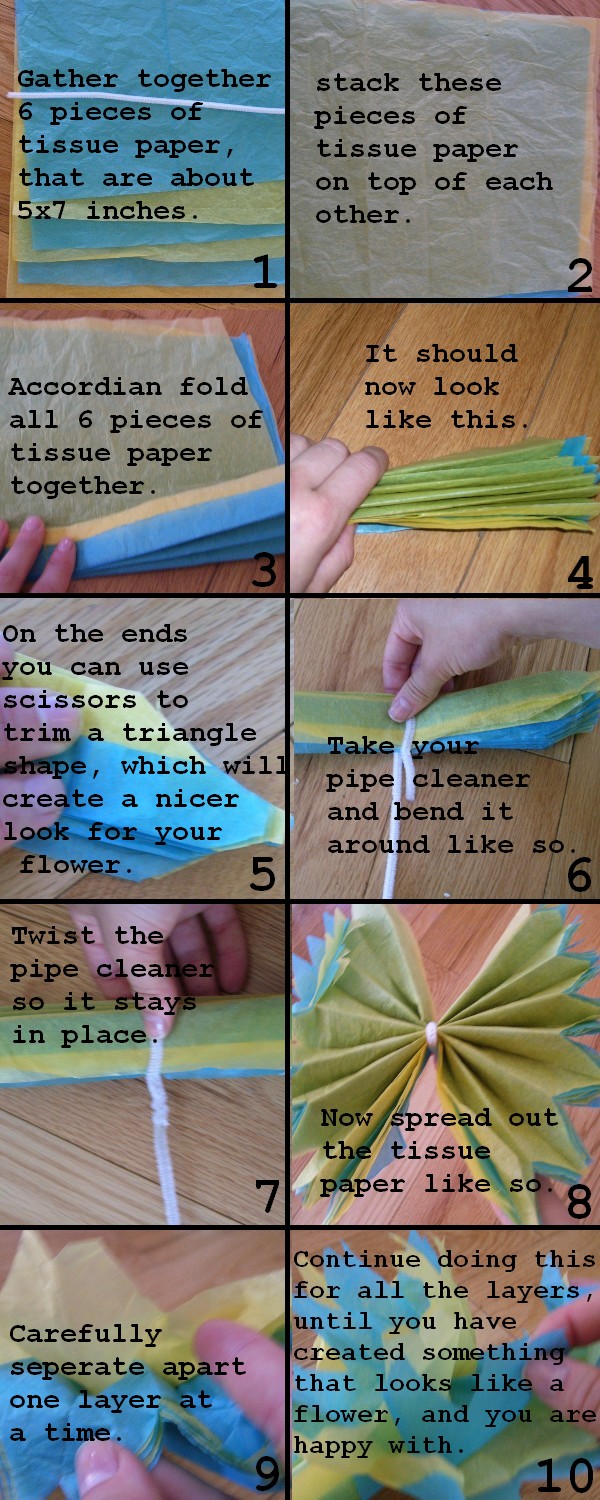
I wanted to share with you all this photo tutorial for a tissue paper flower, that is a great craft for both adults and kids, and can create some neat looking decorations for a party.
